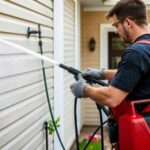
Power washing is one of the most effective ways to clean and maintain the exterior surfaces of your home. From driveways and patios to siding and fences, power washing can remove dirt, grime, mold, mildew, and other contaminants that accumulate over time. While hiring a professional service is always an option, many homeowners prefer the satisfaction and cost savings of tackling the job themselves. However, DIY power washing requires careful planning, proper equipment, and adherence to safety protocols to achieve optimal results without causing damage. In this comprehensive guide, we’ll walk you through every step of the process, from preparation to execution, ensuring your DIY power washing project is both successful and safe.
Why Choose DIY Power Washing?
Before diving into the details, it’s important to understand why DIY power washing might be the right choice for you:
- Cost Savings: Renting or purchasing a power washer is often more affordable than hiring a professional service.
- Flexibility: You can clean at your own pace and schedule the task around your availability.
- Personal Satisfaction: Completing the project yourself provides a sense of accomplishment and pride in maintaining your property.
However, DIY power washing also comes with risks, such as surface damage or personal injury, if not done correctly. This guide will help you navigate these challenges and ensure a smooth, effective cleaning process.

Step 1: Gather the Right Equipment
The first step in any successful DIY power washing project is assembling the necessary tools and materials. Here’s what you’ll need:
1. Power Washer
Choose between electric and gas-powered models based on your needs:
- Electric Power Washers: Lightweight, quieter, and easier to use, making them ideal for small residential projects.
- Gas-Powered Power Washers: More powerful and suitable for larger jobs, but they are bulkier and noisier.
For beginners, an electric model with adjustable pressure settings (ranging from 1,500 to 2,000 PSI) is usually sufficient.
2. Nozzles
Most power washers come with interchangeable nozzles that control the spray pattern and intensity. Common options include:
- 0-Degree Nozzle: High-pressure stream for tough stains; use with caution to avoid damage.
- 15-Degree Nozzle: Ideal for general cleaning tasks.
- 25-Degree Nozzle: Best for delicate surfaces like wood or painted walls.
- 40-Degree Nozzle: Low-pressure setting for rinsing or light cleaning.
3. Cleaning Agents
While water alone is effective for many tasks, using eco-friendly detergents can enhance results. Look for biodegradable cleaners designed for specific surfaces, such as siding, concrete, or wood.
4. Protective Gear
Safety should always be a priority. Wear:
- Safety goggles
- Waterproof gloves
- Non-slip boots
- Long sleeves and pants to protect against debris
5. Additional Supplies
- Garden hose with a reliable water source
- Tarps or plastic sheets to cover plants and windows
- Extension cords (for electric models)
- Bucket and scrub brush for pre-treatment of heavily stained areas
Step 2: Prepare the Area
Proper preparation ensures a smoother cleaning process and minimizes the risk of accidents or damage.
1. Clear the Space
Remove furniture, potted plants, toys, and other obstacles from the area you plan to clean. This prevents accidental damage and allows for unobstructed access to surfaces.
2. Protect Sensitive Areas
Cover nearby plants, shrubs, and electrical outlets with tarps or plastic sheets to shield them from water and detergent runoff. Use painter’s tape to seal windows and doors to prevent water infiltration.
3. Inspect Surfaces
Walk around your property to identify problem areas, such as mold patches, oil stains, or loose paint. Pay attention to the material type (e.g., wood, vinyl, concrete) to determine the appropriate pressure and cleaning technique.
4. Test the Equipment
Before starting, test your power washer on a small, inconspicuous area to ensure it operates correctly and doesn’t cause unintended damage. Check for leaks, clogs, or malfunctioning parts.
Step 3: Apply Detergent (Optional)
For heavily soiled or stained surfaces, applying a cleaning agent before power washing can improve results. Follow these steps:
- Mix the Solution: Dilute the detergent according to the manufacturer’s instructions.
- Switch to Low Pressure: Use the lowest pressure setting or a soap nozzle to apply the solution evenly.
- Allow Soaking Time: Let the detergent sit for 5–10 minutes to break down dirt and grime. Avoid letting it dry on the surface.
Step 4: Begin Power Washing
With everything prepared, it’s time to start cleaning. Follow these guidelines for safe and effective power washing:
1. Start from the Top
Begin at the highest point of the surface and work your way down. This prevents dirty water from dripping onto already-cleaned areas.
2. Maintain Proper Distance
Hold the nozzle 12–18 inches away from the surface to avoid etching or damaging materials. Adjust the distance based on the nozzle type and pressure level.
3. Use Sweeping Motions
Move the wand steadily in side-to-side or up-and-down motions to ensure even coverage. Avoid lingering in one spot for too long, as this can cause streaks or surface damage.
4. Adjust Pressure as Needed
Use higher pressure for durable surfaces like concrete and lower pressure for delicate materials like wood or painted walls. Always err on the side of caution to prevent accidental damage.
5. Rinse Thoroughly
After cleaning, switch to a high-pressure rinse nozzle to remove all traces of detergent and debris. Ensure no residue remains, as it can attract dirt and lead to future staining.
Step 5: Post-Cleaning Steps
Once the power washing is complete, take the following steps to wrap up the project:
1. Inspect Your Work
Walk around the cleaned area to ensure no spots were missed. If necessary, perform touch-ups to achieve a uniform finish.
2. Dispose of Wastewater Responsibly
Avoid letting wastewater flow into storm drains, as it may contain harmful chemicals or debris. Collect and dispose of it according to local regulations.
3. Remove Protective Coverings
Take down tarps, plastic sheets, and painter’s tape carefully to avoid scratching surfaces.
4. Allow Surfaces to Dry
Give cleaned surfaces adequate time to air dry before placing furniture or other items back in place. This reduces the risk of mold or mildew growth.

Tips for Success
To maximize the effectiveness of your DIY power washing efforts, keep the following tips in mind:
1. Start Small
If you’re new to power washing, begin with smaller, less critical areas to build confidence and refine your technique.
2. Be Patient
Rushing the process can lead to mistakes or uneven results. Take your time to ensure thorough cleaning.
3. Monitor Weather Conditions
Avoid power washing during extreme temperatures, as heat can cause detergents to evaporate too quickly, while cold weather may freeze water on surfaces.
4. Practice Safety
Never point the nozzle at people, pets, or electrical components. Keep children and bystanders at a safe distance during operation.
5. Consider Professional Help for Complex Jobs
If you encounter stubborn stains, delicate surfaces, or large-scale projects beyond your skill level, don’t hesitate to consult a professional.
Common Mistakes to Avoid
Even experienced DIY enthusiasts can make mistakes when power washing. Here are some pitfalls to watch out for:
- Using Excessive Pressure: High PSI levels can strip paint, etch concrete, or damage wood.
- Neglecting Surface Preparation: Failing to clear debris or protect sensitive areas can lead to costly repairs.
- Skipping Rinsing: Leaving detergent residue on surfaces attracts dirt and accelerates staining.
- Improper Waste Disposal: Allowing wastewater to enter storm drains violates environmental regulations and harms ecosystems.
Conclusion
DIY power washing is a rewarding and cost-effective way to maintain the cleanliness and appearance of your home’s exterior. By following this step-by-step guide, you can achieve professional-quality results while avoiding common pitfalls. Remember to prioritize safety, use the right equipment, and tailor your approach to the specific needs of each surface. With practice and patience, you’ll master the art of power washing and enjoy a pristine, well-maintained property for years to come.
Whether you’re preparing your home for sale, hosting guests, or simply taking pride in your property, regular power washing is an investment in its longevity and value. So grab your gear, follow these instructions, and transform your home’s exterior with confidence!


