Power washing, or pressure washing, is a popular DIY method for cleaning outdoor surfaces like driveways, decks, siding, and patios. Its ability to blast away dirt, grime, and algae with high-pressure water makes it an appealing choice for homeowners seeking quick, dramatic results. However, without proper technique or preparation, DIY power washing can lead to costly damage, safety hazards, or subpar outcomes. This article explores the most common DIY power washing mistakes, provides detailed explanations of why they occur, and offers professional solutions to fix them, ensuring effective and safe cleaning for your property.
Why DIY Power Washing Goes Wrong
Power washers are powerful tools, delivering water at 1,200 to 4,000 PSI (pounds per square inch)—far beyond a garden hose’s capacity. This strength, while effective, amplifies the potential for error, especially for novices. Mistakes often stem from overconfidence, lack of knowledge about equipment or surfaces, or skipping essential steps. These errors can strip paint, splinter wood, or even injure users, turning a well-intentioned project into a headache. By understanding and addressing these pitfalls, DIYers can achieve professional-grade results without the pitfalls. Let’s dive into the common mistakes and their fixes.

Mistake 1: Using Too Much Pressure
One of the most frequent DIY power washing mistakes is applying excessive pressure, assuming more power equals better cleaning. High PSI settings—above 2,000—can damage delicate surfaces like wood, vinyl siding, or asphalt shingles, causing splintering, etching, or cracking.
For example, blasting a wooden deck at 3,000 PSI might strip the grain or gouge the surface, while hitting siding with the same force can peel paint or dent aluminum. This error often occurs because users overlook the manufacturer’s PSI recommendations or fail to adjust settings for different materials. The result is costly repairs or a compromised finish that looks worse than before.
How to Fix It: Start with the lowest effective pressure—1,200 PSI for wood or siding, 2,500 PSI for concrete—and test on a small, hidden area. Use adjustable wands or dial down PSI on variable-pressure machines. Pair with a wide-angle nozzle (25- or 40-degree) to diffuse the force. Gradually increase pressure only if needed, staying below the surface’s tolerance (e.g., 1,500 PSI max for softwoods). This cautious approach preserves materials while still removing dirt, ensuring a safe, controlled clean.
Mistake 2: Holding the Wand Too Close
Another common error is holding the power washer wand too close to the surface, intensifying the pressure’s impact. Beginners often hover 2-4 inches away, thinking proximity boosts effectiveness. Instead, this concentrates the spray, risking damage like chipped concrete, stripped sealant, or water forced into cracks.
On a driveway, for instance, a close blast can etch lines into the concrete, while on siding, it might puncture vinyl or push water behind panels, leading to mold. This mistake stems from misunderstanding how distance affects pressure distribution—closer isn’t always better.
How to Fix It: Maintain a consistent 6-12 inch distance from the surface, adjusting based on material: 6-8 inches for sturdy concrete, 10-12 inches for wood or siding. Hold the wand at a 30-45-degree angle to spread the spray and reduce intensity. Practice on a test patch to find the sweet spot where dirt lifts without harm. If stains persist, use detergent instead of closing the gap—patience and technique trump brute force, protecting your surfaces from unnecessary wear.
Mistake 3: Skipping Detergent Application
Many DIYers skip detergent, relying solely on water pressure to clean, under the misconception that power alone suffices. While this might work for loose dirt, it fails against oil, algae, or mildew, which cling to surfaces through chemical bonds water can’t break.
For example, algae on a patio may appear gone after washing, but spores remain, leading to rapid regrowth. Oil stains on a driveway stay embedded without a degreaser, leaving an uneven finish. This oversight wastes time and effort, delivering incomplete results.
How to Fix It: Always use a surface-appropriate, biodegradable detergent—Wet & Forget for algae, Krud Kutter for oil, or Simple Green for general grime. Apply with a low-pressure setting (1,200 PSI) or pump sprayer, letting it dwell for 10-15 minutes to loosen contaminants. Rinse with the power washer to flush residue away. For tough stains, scrub lightly with a stiff-bristle brush during dwell time. Detergent enhances cleaning power, ensuring a thorough, lasting finish without excessive pressure.
Mistake 4: Ignoring Surface-Specific Needs
Failing to tailor power washing to the surface type is a widespread mistake that damages materials. Concrete, wood, vinyl, and brick each have unique tolerances, and a one-size-fits-all approach—say, 3,000 PSI across the board—can ruin them. Wood splinters, vinyl cracks, and brick erodes if treated like concrete, which withstands higher pressure.
DIYers often overlook this because rental units or manuals don’t specify adjustments, or they assume all surfaces are equally resilient. A deck washed like a driveway, for instance, might lose its finish, while siding blasted like brick could warp.
How to Fix It: Research your surface’s PSI limit—1,200-1,500 PSI for wood, 2,000-2,500 PSI for vinyl, 2,500-3,000 PSI for concrete or brick. Use a wide-angle nozzle (25-40 degrees) for softer materials, reserving narrower tips (15 degrees) for tough stains on hard surfaces. Test settings on a small area first, checking for damage like raised grain or chipping. Adjust detergents too—wood-safe cleaners for decks, concrete-specific ones for sidewalks. This tailored approach ensures effective cleaning without compromising surface integrity.
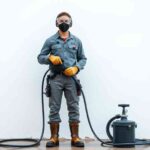
Mistake 5: Neglecting Safety Precautions
Power washing seems straightforward, but neglecting safety precautions can lead to injuries or property damage. The high-pressure stream can cut skin, kickback from the wand can cause falls, and wet surfaces increase slip risks. DIYers often skip goggles, gloves, or proper footwear, underestimating the tool’s power.
For example, spraying without eye protection risks debris ricochet, while bare hands near the nozzle invite cuts. Wet shoes on a ladder during siding cleaning can lead to a tumble. This mistake arises from rushing or over-familiarity, bypassing basic safeguards.
How to Fix It: Wear full safety gear—goggles, heavy-duty gloves, and non-slip boots—every time. Brace the wand with both hands to control kickback, keeping it away from your body. Work on dry, stable ground, using a ladder only with a spotter for elevated areas. Shut off the machine when adjusting nozzles or moving, and never point it at people, pets, or fragile objects like windows. Safety-first habits prevent accidents, letting you focus on cleaning with confidence.

Mistake 6: Forgetting Runoff Management
DIYers often overlook runoff, letting detergent, dirt, and debris flow into lawns, drains, or neighbor’s yards. This can harm plants, pollute waterways, or violate local regulations, especially in urban areas with strict environmental codes.
Washing a driveway without containment, for instance, might send oily runoff into a storm drain, risking fines. On a deck, detergent could kill grass below if not redirected. This error stems from focusing on the task and ignoring its aftermath.
How to Fix It: Plan runoff control—lay tarps or plastic sheeting to catch water, directing it to a safe spot like a gravel bed or dry well. Use a wet/dry vacuum for small areas or absorbent mats for oil-heavy runoff. Choose biodegradable detergents to minimize ecological harm, and check local rules—some cities require containment systems. Post-wash, rinse runoff areas with clean water to dilute residue. Proper management keeps your project eco-friendly and compliant, avoiding legal or landscaping headaches.
Mistake 7: Not Rinsing or Drying Properly
Failing to rinse thoroughly or dry surfaces after power washing can undo your efforts. Leftover detergent attracts dirt, while trapped water in wood or cracks leads to rot or freezing damage. DIYers often stop once stains lift, skipping these final steps.
On a patio, soap residue might leave a sticky film; on a deck, wet wood could warp without drying. This happens due to fatigue or underestimating the importance of finishing touches.
How to Fix It: Rinse with a low-pressure setting (1,200-1,500 PSI) and a 40-degree nozzle, flushing all detergent and debris—check crevices and undersides. Direct water away from plants or into containment. Let surfaces air-dry fully—24-48 hours for concrete, longer for wood in shade—tilting furniture or sweeping puddles to speed it up. For wood, consider a fan or towel-drying to prevent moisture issues, then seal if needed. A proper finish ensures a clean, durable result that lasts.
Conclusion
DIY power washing can transform your property when done right, but common mistakes like excessive pressure, poor technique, or skipped steps can turn it into a disaster. By using appropriate PSI, maintaining distance, applying detergents, tailoring to surfaces, prioritizing safety, managing runoff, and finishing thoroughly, you avoid damage and achieve professional results. Each fix turns a potential pitfall into a strength, preserving your surfaces and safety.
Power washing doesn’t have to be daunting. With these insights, invest in the right tools, take your time, and enjoy a spotless, hazard-free property. Avoid these errors, and your DIY project will shine—searchable under “power washing tips” or “DIY cleaning fixes” for years to come.