Outdoor furniture enhances the appeal and functionality of patios, decks, and gardens, but constant exposure to weather, dirt, and organic growth can leave it looking worn and grimy. Power washing, also known as pressure washing, provides an efficient and thorough method to restore outdoor furniture to its original beauty. Using high-pressure water and the right techniques, you can remove dirt, mold, mildew, and stains from materials like wood, metal, plastic, and wicker. This article offers a comprehensive guide with professional tips and tricks for cleaning outdoor furniture with power washing, ensuring effective results while preserving its integrity.
Understanding the Benefits of Power Washing Outdoor Furniture
Power washing stands out as a superior cleaning method for outdoor furniture due to its ability to tackle stubborn contaminants quickly and effectively. Unlike manual scrubbing, which is labor-intensive and often leaves residue, power washing uses pressurized water—typically 1,200-2,000 PSI—to blast away dirt, pollen, and biological growth in minutes. This efficiency is particularly valuable for large sets or intricate designs, such as wicker chairs or metal tables with crevices.
The process also rejuvenates surfaces without harsh chemicals, making it eco-friendly when paired with biodegradable detergents. For homeowners or businesses with outdoor seating—like cafes or resorts—clean furniture enhances curb appeal, improves hygiene, and extends the lifespan of these investments. However, success hinges on understanding your furniture’s materials and applying the right approach. Let’s explore the detailed tips and tricks to master this task.
Tip 1: Assess Furniture Material and Condition
Before power washing, assess the material and condition of your outdoor furniture to tailor your cleaning method. Different materials—wood, metal, plastic, wicker, or fabric cushions—react uniquely to pressure and water, and their age or wear influences the process. Misjudging this step can lead to damage like splintered wood or faded finishes.
For wooden furniture (e.g., teak, cedar), check for cracks, loose joints, or existing sealant—older pieces may splinter under high pressure. Metal items (e.g., aluminum, wrought iron) might have rust or peeling paint, requiring gentler settings. Plastic or resin furniture is durable but can scratch if pressure is too intense, while wicker—natural or synthetic—needs low pressure to avoid fraying. Cushions or fabric elements should be removed or covered, as water can soak or ruin them.
Inspect for algae, mildew, or heavy dirt buildup, noting areas needing extra attention. This assessment guides your PSI (pounds per square inch) choice—1,200 PSI for delicate wicker, up to 2,000 PSI for sturdy metal—and detergent use. A thorough evaluation ensures you clean effectively without compromising the furniture’s structure or appearance.
Tip 2: Gather the Right Equipment and Supplies
Having the proper equipment and supplies is essential for successful power washing. A well-equipped setup saves time, enhances results, and protects both the furniture and the user. Skimping on quality or preparation can lead to subpar cleaning or unintended damage.
Start with a power washer—electric models (1,200-2,000 PSI) are ideal for most outdoor furniture due to their manageable power and ease of use, while gas-powered units suit larger, tougher jobs. Select nozzles: a 25-degree (green) or 40-degree (white) tip offers a wide, gentle spray, perfect for furniture, while avoiding 0-degree (red) tips that concentrate pressure too narrowly. A detergent injector or tank is key for tackling organic stains.
Choose a biodegradable cleaner suited to your material—Simple Green for wood, Krud Kutter for metal, or a mildew-specific solution (e.g., Wet & Forget) for algae. Add a stiff-bristle brush for pre-scrubbing stubborn spots, tarps to protect surrounding areas, and safety gear—goggles, gloves, and closed-toe shoes—to shield against spray or debris. Ensure a steady water supply (e.g., a ¾-inch hose) for consistent flow (2-5 GPM). This arsenal equips you for a professional-grade clean, tailored to your furniture’s needs.
Tip 3: Prepare the Furniture and Surrounding Area
Preparation sets the stage for safe and effective power washing, protecting both the furniture and its environment. Skipping this step risks water damage to nearby surfaces or injury from slippery conditions, so take time to set up properly.
Remove cushions, pillows, or fabric elements—store them indoors or cover with waterproof tarps if detachable. For fixed upholstery, tape plastic sheeting over it securely. Clear the furniture of debris—sweep off leaves, dirt, or spider webs with a broom or soft brush to expose the surface fully. Move pieces to an open, flat area like a driveway or patio, away from delicate plants or walls that could catch overspray.
Cover nearby grass, shrubs, or flowers with tarps, wetting them first to dilute any detergent runoff. Check weather—avoid windy days that scatter spray, and ensure drying time post-wash (24-48 hours). For multi-piece sets, work in batches, keeping unwashed items aside. This prep minimizes mess and damage, letting you focus on cleaning with precision.
Tip 4: Apply Detergent for Deep Cleaning
Applying a detergent before power washing enhances algae, mildew, and grime removal, especially on outdoor furniture exposed to organic growth. Water alone may dislodge surface dirt, but detergents break down stubborn stains, ensuring a deeper, longer-lasting clean.
Select a cleaner based on material: a wood-safe option like Scotts Outdoor Cleaner for teak, or a mild soap (e.g., Dawn diluted 1:10) for plastic and metal. For algae or mildew, use a biocide like Wet & Forget. Apply with a low-pressure setting (1,200 PSI) or a pump sprayer, coating all surfaces evenly—top, sides, and undersides where mold hides. For wicker, work detergent into crevices with a brush to loosen debris.
Let it dwell for 5-15 minutes—longer for heavy growth—but keep it wet by misting if it dries, maximizing penetration. This step preps the furniture for pressure washing, lifting contaminants so the water can flush them away effortlessly. Skipping detergent risks incomplete cleaning, especially on porous or textured surfaces.
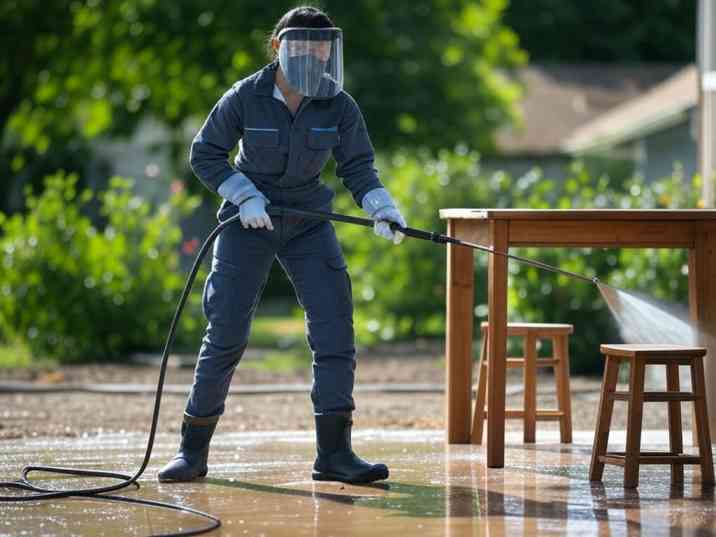
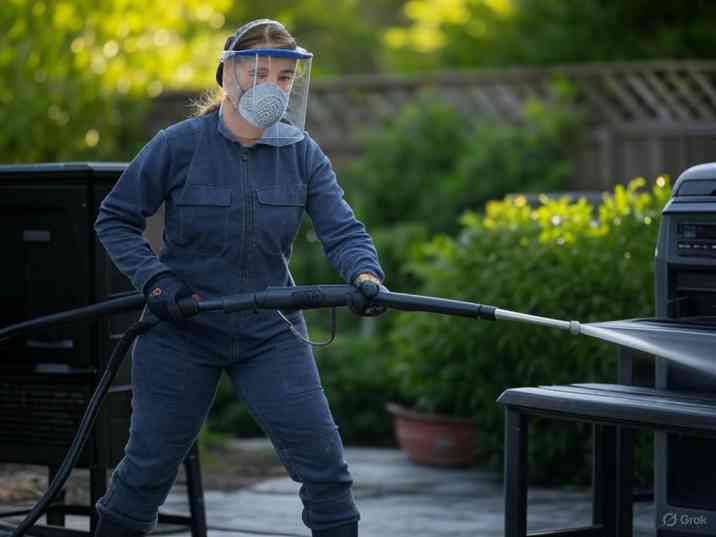
Tip 5: Power Wash with Proper Technique
The power washing stage requires technique to remove dirt without damaging furniture. Incorrect pressure, distance, or angle can splinter wood, dent metal, or fray wicker, so precision is key for professional results.
Start with a low-pressure test (1,200 PSI) on an inconspicuous spot, adjusting up to 1,500-2,000 PSI if needed—wood and wicker stay lower, metal or plastic can handle more. Use a 25- or 40-degree nozzle for a wide, gentle spray. Hold the wand 6-12 inches from the surface at a 30-45-degree angle, avoiding direct blasts that gouge or strip finishes. Move in smooth, overlapping strokes, following wood grain or metal contours for even coverage.
Work top-down on tables or chairs, rinsing detergent and debris downward. For intricate wicker or metal frames, adjust closer (6-8 inches) briefly to clean crevices, then widen the gap. If stains persist, pause, reapply detergent, and wash again. Technique ensures a thorough clean while preserving the furniture’s look and structure.
Trick: Rinse and Dry Thoroughly
Rinsing and drying are critical final steps to lock in your cleaning efforts. Leftover detergent or water can attract dirt or cause rot, so attention here ensures lasting results.
Switch to a low-pressure rinse (1,200 PSI) with a 40-degree nozzle, washing from top to bottom to flush all residue—check undersides and joints where soap hides. Use steady sweeps to avoid streaks, directing runoff away from plants or into a tarp-covered drain. Inspect for missed spots—wet surfaces may hide faint stains that show when dry—and re-wash if needed.
Dry furniture fully—tilt chairs or tables to drain water, then air-dry in sunlight for 24-48 hours. For wood, consider a fan or towel-drying to speed up moisture removal, preventing warping. Thorough drying prevents mildew regrowth, leaving furniture ready for use or sealing.
Trick: Seal for Long-Term Protection
Post-washing, sealing protects furniture from future dirt and algae, extending its lifespan. This extra step locks in your cleaning efforts, making maintenance easier.
For wood, apply a water-repellent sealant (e.g., Thompson’s WaterSeal) with a brush or sprayer, coating evenly after drying—two coats for porous teak. Metal benefits from a clear coat or rust inhibitor (e.g., Rust-Oleum), while plastic or wicker can skip sealing unless UV-faded (use a UV protectant spray). Follow curing times (24-48 hours) before use.
Seal annually or after heavy cleaning to maintain a barrier against moisture and stains. This trick preserves your furniture’s beauty and reduces power washing frequency, saving time and effort.
Conclusion
Cleaning outdoor furniture with power washing revitalizes its appearance and functionality when done right. By assessing materials, gathering supplies, preparing thoroughly, applying detergents, using proper techniques, rinsing well, and sealing, you achieve professional-grade results that enhance your outdoor space. These tips and tricks ensure efficiency and safety, protecting your investment from damage.
With the right approach, power washing turns grimy furniture into a welcoming centerpiece. Invest in quality tools, follow this guide, and enjoy durable, spotless outdoor seating that impresses guests and withstands the elements year-round.