Algae growth on outdoor surfaces—whether on driveways, decks, siding, or roofs—can transform a pristine property into an unsightly, slippery hazard. This persistent green or black coating not only detracts from curb appeal but also poses safety risks and potential damage if left unchecked. Power washing, also known as pressure washing, offers a highly effective solution for algae removal, combining high-pressure water with targeted detergents to restore surfaces to their original condition. This comprehensive guide details how to effectively remove algae with power washing, providing step-by-step instructions and professional insights to ensure optimal results.
Understanding Algae and Its Impact on Surfaces
Before tackling algae removal, it’s essential to understand what algae is and why it’s a problem. Algae are simple, plant-like organisms that thrive in moist, shaded environments, feeding on organic material and sunlight. Common in humid climates or areas with poor drainage, algae appear as green, black, or reddish films on surfaces like concrete, wood, vinyl, and asphalt shingles. While they don’t directly eat materials, their presence traps moisture, fostering mold, mildew, or rot—especially on wood or porous surfaces.
The impact goes beyond aesthetics. On walkways or patios, algae create slick conditions, increasing slip-and-fall risks. On roofs, they can lift shingles or degrade coatings, leading to leaks. Power washing addresses these issues by physically removing algae and its spores, preventing regrowth when paired with proper techniques and cleaners. This guide breaks down the process, ensuring you combat algae effectively while protecting your surfaces.

Step 1: Assess the Affected Area and Surface Type
The first step in effective algae removal is assessing the affected area and identifying the surface type, as this determines your power washing approach. Algae severity varies—light green films indicate early growth, while thick black patches signal deeper rooting, requiring more aggressive treatment. Surface material also matters: concrete can withstand higher pressure, while wood or shingles demand gentler handling to avoid damage.
Walk the property and note algae locations—driveways, decks, siding, or roofs—and their condition. For concrete, check for cracks where algae might hide; for wood, look for raised grain or rot; for shingles, assess brittleness. This evaluation guides your equipment and detergent choices. For light algae on concrete, a 2,000 PSI pressure washer might suffice, but thick growth on a wooden deck may need a 1,200 PSI unit with a wide-angle nozzle.
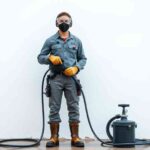
Gather supplies based on this assessment: a power washer (gas or electric), nozzles (15-40 degrees), an algae-specific detergent (e.g., Wet & Forget or Simple Green Oxy Solve), a stiff-bristle brush, protective gear (goggles, gloves), and tarps for runoff control. Proper assessment ensures you tailor the process, maximizing algae removal while minimizing surface harm.
Step 2: Prepare the Area and Protect Surroundings
Preparation is critical to safe and effective power washing. Algae removal involves water, detergents, and pressure, which can affect nearby plants, pets, or structures if not managed. Taking time to prep the area prevents unintended damage and ensures a smooth workflow.
Start by clearing the surface—sweep away leaves, dirt, or debris from driveways, decks, or roofs to expose algae fully. For elevated areas like siding or roofs, secure ladders and wear non-slip shoes for safety. Cover nearby plants, shrubs, or grass with tarps or plastic sheeting, as detergents can harm foliage even if biodegradable. Wetting plants beforehand dilutes any overspray, adding an extra layer of protection.
Close windows and doors near the work area to prevent water intrusion, and tape over electrical outlets or fixtures. If washing a roof, check weather forecasts—avoid windy days that could blow spray onto unprotected surfaces. For large areas, work in sections, marking boundaries with chalk or tape. This preparation safeguards your property and environment, allowing focused, efficient algae removal.
Step 3: Apply an Algae-Specific Detergent
Applying a detergent designed for algae is a game-changer in power washing, as water alone often fails to kill spores or lift thick growth. These cleaners contain biocides or surfactants that break down algae’s cellular structure, making it easier to remove and preventing regrowth.
Choose a biodegradable, algae-targeting product like Wet & Forget, which uses quaternary ammonium compounds to kill spores, or Simple Green Oxy Solve, with oxygenated bleach for lifting organic stains. Dilute per instructions—typically 1:10 with water—and apply using a low-pressure setting (around 1,200 PSI) or a pump sprayer for precision. For concrete or siding, spray evenly across the surface; for roofs or wood, use a fan pattern to avoid over-saturation.
Let the detergent dwell for 10-20 minutes—longer for heavy algae—but keep it wet by misting if it starts to dry. This dwell time allows the химия to penetrate and loosen algae, especially in porous materials where roots embed deeply. Pre-treatment is non-negotiable: skipping it risks leaving spores behind, leading to rapid recurrence.
Step 4: Power Wash with Proper Technique
With the detergent applied, power washing removes algae efficiently if done with the right technique. Adjust your equipment based on surface type: concrete can handle 2,500-3,000 PSI with a 15-degree nozzle, while wood or shingles need 1,200-1,500 PSI with a 25- or 40-degree nozzle to prevent damage.
Start at the highest point—e.g., roof peak or siding top—and work downward, letting gravity aid runoff. Hold the wand 6-12 inches from the surface at a 30-45-degree angle, avoiding perpendicular blasts that can etch concrete or splinter wood. Use smooth, overlapping sweeps, moving with the grain on wood or the slope on pavement for even cleaning. For roofs, keep pressure low and distance greater (12-18 inches) to protect shingles.
If algae resists, pause and reapply detergent to stubborn spots, then wash again. Hot water (up to 200°F) enhances results on thick growth, breaking down algae faster. Technique is critical—rushing or using excessive pressure damages surfaces, while patience ensures a thorough, spore-free clean.
Step 5: Rinse and Inspect Thoroughly
Rinsing and inspecting after power washing ensures all algae, detergent, and debris are removed, leaving a spotless surface. Switch to a low-pressure setting (1,200-1,500 PSI) with a 40-degree nozzle and rinse from top to bottom, flushing residue away from cleaned areas. Direct runoff to a containment area—using tarps or a wet/dry vacuum—especially if local regulations mandate it to protect waterways.
Inspect the surface under good lighting—wet pavement may hide faint algae shadows that appear as it dries. For concrete, a uniform light gray indicates success; for wood, check for smooth texture without green tint. If traces remain, spot-treat with detergent and re-wash. Allow the surface to dry fully (24-48 hours, weather dependent) before final evaluation, as drying reveals any missed spots.
Thorough rinsing prevents detergent buildup that could attract dirt, while inspection confirms algae is eradicated. This step locks in your efforts, delivering a clean, safe surface ready for use or sealing.

Step 6: Prevent Algae Regrowth with Maintenance
Removing algae is only half the battle—preventing its return preserves your work. After power washing, apply a sealant suited to the surface: concrete sealers (e.g., siloxane-based) repel water and algae, while wood sealants (e.g., Thompson’s WaterSeal) block moisture. Brush or roll on evenly, following curing times (typically 24-48 hours).
Improve drainage to reduce standing water—clear gutters, slope pavement, or trim overhanging branches to increase sunlight, which algae dislike. Schedule regular power washing—biannually or after wet seasons—to catch early growth. For roofs, consider zinc or copper strips near the ridge; rain washes these metals down, inhibiting algae naturally.
Maintenance minimizes recurrence, saving time and effort long-term. Consistent care keeps surfaces algae-free, maintaining aesthetics and safety without frequent deep cleans.
Conclusion
Power washing is a proven, efficient method for effective algae removal, restoring driveways, decks, siding, and roofs to their best condition. By assessing surfaces, preparing thoroughly, using algae-specific detergents, applying precise techniques, rinsing carefully, and maintaining proactively, you can eradicate algae and prevent its return. This comprehensive approach ensures professional results, enhancing property value and safety.
Algae doesn’t have to be a persistent problem. With the right tools—pressure washer, detergents, and knowledge—you can tackle it confidently, transforming green, slippery surfaces into clean, vibrant ones. Follow this guide, invest in quality supplies, and enjoy an algae-free property that stands out for all the right reasons.